Getting some color

The spec theme of this years rally is identifiable famous rally cars.

Since an old conversion van in it’s current state will never be mistaken for a rally car it is time to get creative and add some color.

roof paint1


I found out that white Rustoleum applied with a roller over dark green porous fiberglass doesn’t cover very well.

Van is inspected!

Big week at the fool-injected garage.  The van has a new PA inspection and emissions sticker!  Now I can finally start putting some shakedown miles on the van legally, and start working on this years vehicle theme “Rally Cars”  inspected

I needed to replace the front rotors before I could get the sticker.  The pads looked good, and the outside of the rotors looked okay, but my mechanic pointed out that the inside face of the rotors had issues.  After pulling the rotors I agree with him that they needed to be replaced.  New pads and repacked wheel bearing finished out the front.

Brakes are not something I wanted to cheap out on.  To quote one of the other Rally participants.  “If your car doesn’t start it is an inconvenience.  If your car doesn’t stop it can be deadly.”


BABE quality bodywork is done.

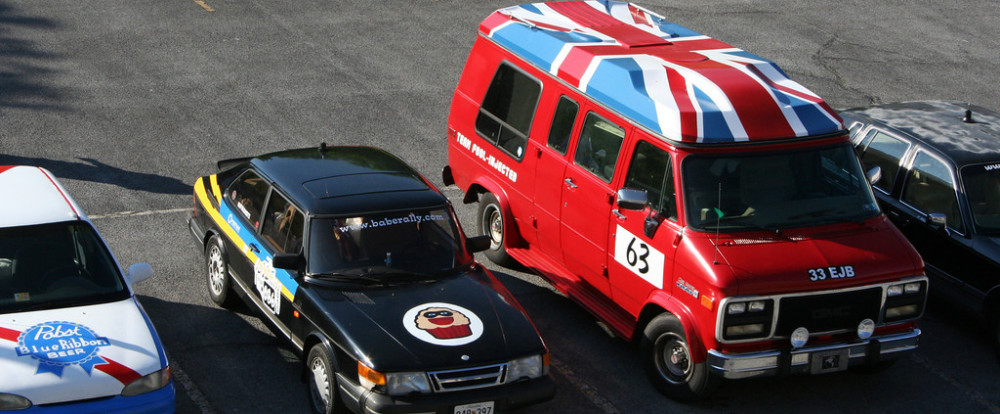
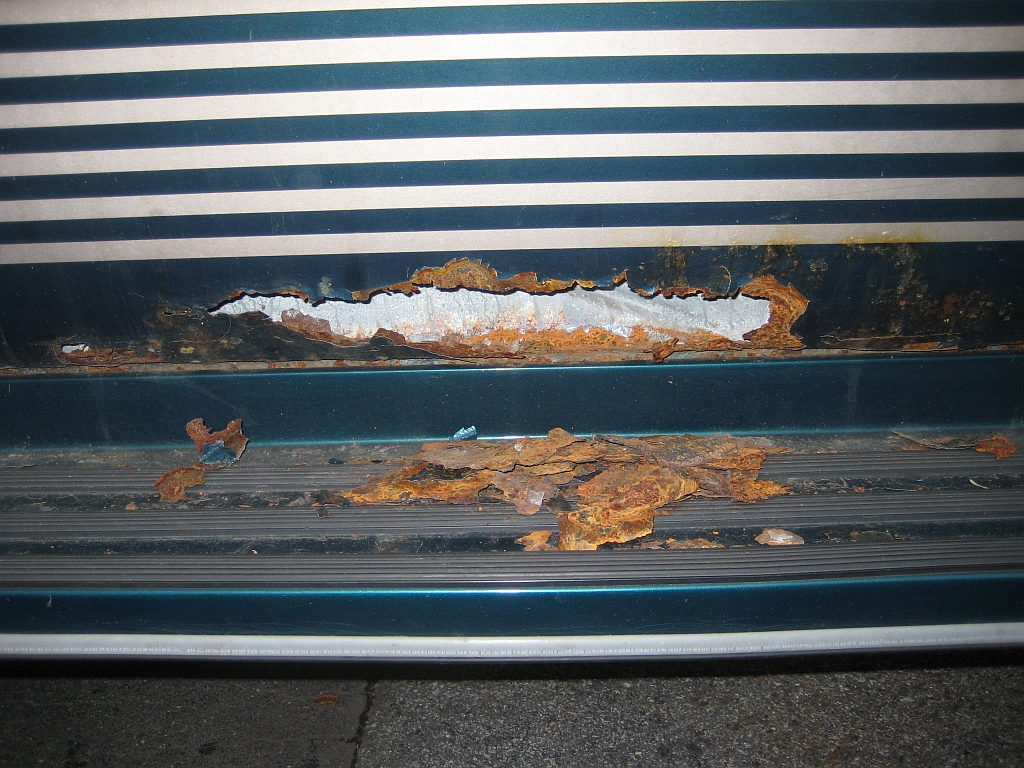
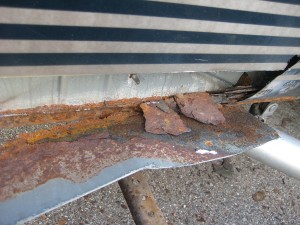
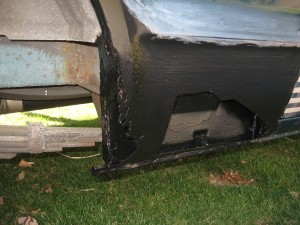
There were some rust problems that needed to get fixed before I could get the van inspected.  I believe the part of the inspection code that deals with rust holes is defined as “Protruding objects. There may be no torn metal, glass or other loose or dislocated parts protruding from the body of the vehicle”  before2 before1

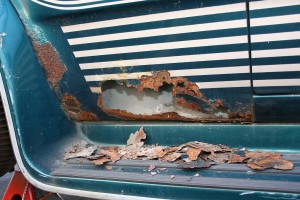
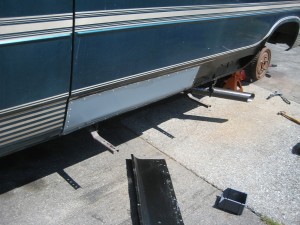
Patch panels are available but expensive. Since this will always be a $500 van I decided to do the cheap and easy fix using old some old steel shelves and pop rivets to make my own panels.  The first step was to cut out all the rust. (I could have just slapped the panels over the top of the body but if the van makes it back from New Orleans it should have some life left in it for the next owner)   cutting1 cutting2

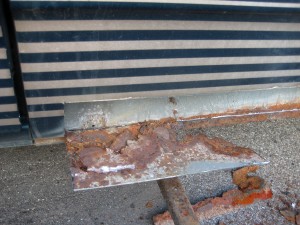
I made some patterns and took the grinder to some old shelving I had.

shelf2shelf1


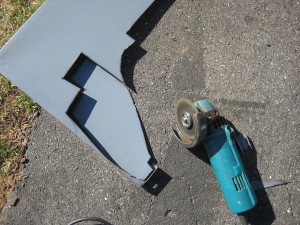
Some gentle bending with a piece of PVC pipe and I had some new rocker panels.  during1

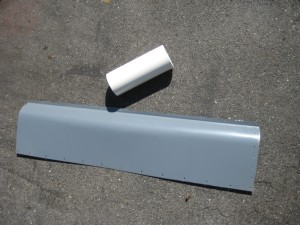
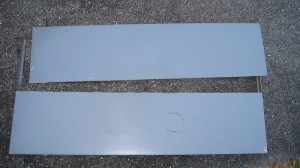
I hate rust so I primed and painted everything while it was apart.

during2

And started installing the pieces.

after1


after3

after4

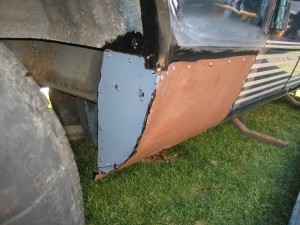
The fiberglass fender flares took care of the wheel well edge.  I used some seam sealer between the patch panels to try and keep out the moisture.  Did I mention that I hate rust?  These patches will be there long after the vehicle is gone from the fool-injected driveway.  All it cost me was a box of pop rivets, a tube of seam sealer, some old paint I already had and some shelves that were getting thrown out at work.


Free cup holder

The cup holders in the back of the van had been lost.  Sitting in a seat, it looks like there is a cup holder, but your beverage would get lost behind the wall!  I had already dug out an empty can of soda. It was full when it was lost years years ago, but was now empty after it had frozen and exploded.  (You have got to love a $500 car)

no holder


I didn’t want anyone on the Rally to loose their drink, so I was looking for a solution.

I checked eBay and replacement holders are available, but buying them and paying for shipping would cut into the beer money.  A quick stop at the recycle bin the and I had the perfect (free) solution.  A Bush’s bean can was the ideal size.

holderProblem solved!


Drivers window now works.

When I bought the van the drivers side window was questionable.  It was up but didn’t seem to want to go down so I didn’t mess with it until I got it home.  Sure enough the window went down about 3 inches and then wouldn’t move in either direction.  A garbage bag was utilized to keep out the rain.  window bag

Since we are on a tight budget I thought about leaving it like it was but I am not sure it would pass a PA inspection, and I know I didn’t want to listen to a plastic bag flap in my ear for a week.  The good news is a new replacement motor was only $25 delivered.

window motor

Parts are so much easier (and cheaper) than last years orphan Rambler.

It took me some time to figure out how to get it replaced,  but I was able to swap it out without removing the window regulator mechanism.

window guts


Success!  The drivers window now goes up and down.

window up


Next step is bodywork, and then a trip to the inspection station.